'Love to Shine' Earrings
For this project you will need:
2 Head pins - Silver plated or sterling silver it's up to you.
2 Ear wires - '' ''
2 Swarovski crystals size 8mm in colour 'Crystal AB'
4 Swarovski crystals size 6mm in colour ' Crystal AB'
2 Swarovski crystals size 4mm in colour 'Crystal AB'
Tools:
Round nose pliers
Chain nose pliers
Wire cutters
Ruler
Safety glasses (Don't stick metal items into electric sockets, jump off high buildings or put your cat in the microwave either!)
Thread one 8mm, two 6mm and a 4mm crystal onto a headpin.
Hold the headpin just above the crystals with your round nose pliers.
Bend the headpin to a 90 degree angle using your fingers.
Your head pin will look like this.
Now use your wire cutters to cut the bent part of the headpin down to 6mm.
Watch out when you clip headpins because the cut off end tends to fly!
Now using your round nose pliers hold the head pin by the end and twist it/roll it over towards the bend making it into a loop as shown below.
(You will need to use your other hand to hold the crystals still whilst you turn the loop.)
Your loop should look like the above.
If you need to straighten the earring or close the loop a little more you can do so using your chain nose pliers.
Now use your round nose pliers to open the circular 'eye' at the bottom of the ear wire. You will notice a tiny join in the circle. Twist the pliers outwards at this point to open the 'eye'.
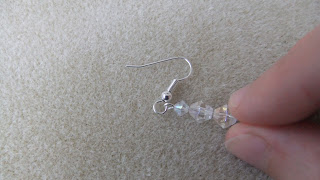
Thread your freshly looped headpin onto the open eye.
Use your round nose pliers and just as you turned your loop on the headpin, do the same here to close the eye. Twist the pliers towards the ear wire until it touches and closes the eye loop.
Repeat the steps again to make the second earring.
Your super sparkly Swarovski lovelies are ready to wear!
Congratulations on making your very first and very fabulous earrings!
It's time for you to sparkle and shine :-)


No comments:
Post a Comment